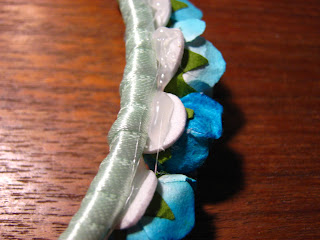
First of all, the floral crown! It's finished! And here are the crappy photos of the build and finished product!
Step 1:
Try to clean your room, and then get board and insist on going for a walk to Dollarama to get some fresh air and some exercise. While there, be inspired and gather your materials.
-6 pack of plastic head bands (multi-coloured no less, black, brown and "blond"),
-Green ribbon, and
-Pack of stick-on paper flowers.
-Have a glue gun and sticks already.
Step 2:
Using your glue gun (badly in my case), wrap your ribbon around the head band. You can either glue and secure as you go along the entire head band, or just mega glue the bottom ends like I do. I found that if you wrap the ribbon tightly, it didn't shift or move once finished.
Pro-tip--> Keep a lighter handy, and burn the edges of cut ribbon to seal them and stop fraying. Burn carefully, they will melt a bit.
Step 3:
Start hot gluing those puppies on! I recommend picking a "front" of the head band, and face the flowers towards that direction. Try to get them fairly close together, or not. Whichever you'd prefer for your crown. There were some instances when the flower became detached from the foam sticky base it was on, so I just added more hot glue. It got a little messy back there, but this will be fixed momentarily.
Time to cover up that mess in the back. Hot glue ribbon over the foam sticky pads of the flowers. This will cover the mess and further strengthen the flowers on the head band. I used smaller pieces of ribbon with slits cut in the bottom half to fold over themselves. This, in theory, creates a curve in the ribbon and will allow it to sit a little flatter. I'm sure you can attempt to do this with one piece of ribbon instead of many.
Step 5:
Wear it. Try to fiddle around with strange backgrounds, like an art poster purchase from the Montreal Museum of Fine Arts almost 4 years ago. Also, attempt to actually wear outside the apartment.
There are several floral crown tutorials out there, I know. Lana Del Ray bringing the trend back, along with the summer festival season last year has cemented the floral crown in the young'uns' wardrobe. To add to the repertoire of links to check out, may I recommend,
Mr Kate's DIY fabric floral headpiece tutorial,
Threadbanger's DIY Frida inspired floral crown tutorial (They're back!!! Soooo excited) (one could argue that my crown's construction is very much based on this tutorial),
and of course, the lovely and wonderful, Aunt Peaches's tutorial for a coffee filter fascinator. Yep.
As some of you may remember, I mentioned that I was going to New York City soon. Well, that was last weekend, and it was awesome. It was great to see some of my old classmates, and we got some amazing tours of the New York Public Library's collection of photographs, and the Museum of Modern Art's preservation facility. I also only took two pictures the entire time I was there. Quite pathetic in comparison to the first time I went to New York really, but what can you do? Here they are, by the way.
Breakfast, at the New York Public Library near Brant Park.
It was pretty awesome. It helped that is was a balmy 15 degrees in NYC, and not the 0 with ice pellets we seem to have in the Tdot at the moment.
I actually have some material for upcoming posts since I'm broke and am saving money by cooking my own meals, some of which in bulk.


No comments:
Post a Comment