I am pretty thrilled. So thrilled, that I clearly decided not to do anything about it until about 2 months later. They've been celebrating their return with some great tutorials for fashion recons including this fantastic Rorschach T-shirt!
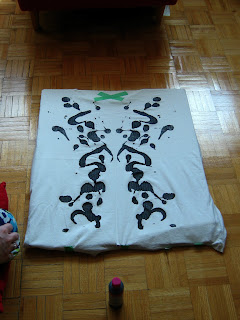
Screen captioned/Stolen from the video posted below.
About 2 days after I saw this tutorial, Value Village had a half off sale, so clearly this was going to have to happen. Also, I decided it needed some neon. This post is pretty picture heavy from now on, be warned.
Supplies:
-White or light coloured shirt,
-Black fabric paint (NOT the puffy style), and some neon colours if you want to go that route,
-Cardboard,
-Exacto knife,
-Tape,
-Iron with steam setting,
Supplies:
-White or light coloured shirt,
-Black fabric paint (NOT the puffy style), and some neon colours if you want to go that route,
-Cardboard,
-Exacto knife,
-Tape,
-Iron with steam setting,
Step 1: Luck out with a Value Village sale and find an old, giant, white Joe Fresh T-shirt. Feel slightly guilty about it because of recent news involving Bangladesh and Joe Fresh, but figure that you're still stopping the shirt from being thrown out and ending up in a landfill, so feel slightly better.
Feel free to model them in some awesome Leopard print leggings that you just got from Domino Dollhouse since their Astralnauts collections in now on clearance.
Step 2: Find some cardboard to put on the inside of the shirt. Cut a
line in the middle of that cardboard to allow it to fold in half easily.
The board stops the paint from bleeding through and keeps the shirt
rigid while folding it over.
*Use some painters tape to secure the shirt since the low stick factor will allow you to peel it off safely, ish.
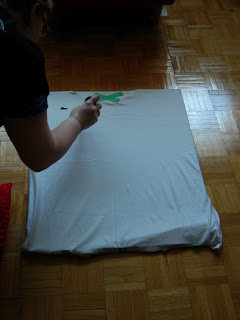
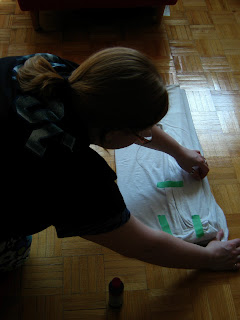
Step 2b): Discover that the only cardboard you have is slightly smaller than the shirt, so tape up the sleeves and bottom of the shirt to itself to get a better fit.
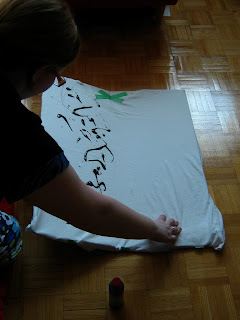
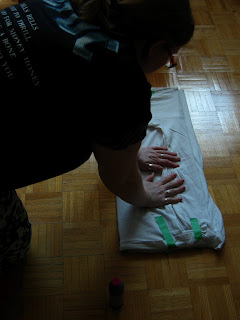
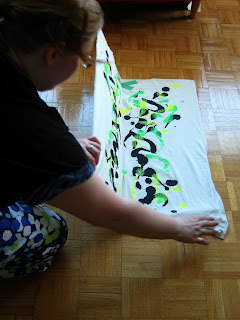
Step 3: Shake up your first colour of fabric paint and blob some of it on one side of the shirt. Fold over and press firmly!
Step 4: Unfold and admire! From now, you can either:
Step 4: Unfold and admire! From now, you can either:
a) Wait the requisite 4 hours for the paint to dry and skip to step 5, or
b) Wait the requisite 4 hours for the paint to dry and either add more of your original colour or do some more colours, repeating step 3 and 4, or
c) Do what Rob does in the video and quick dry the paint with a hair dryer on high.
Step 5: Following the instructions on the side of the paint tube, iron the well dried shirt on a steam setting to set the paint.
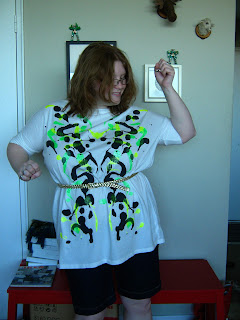
I'm pretty happy with how this shirt turned out! That being said, there was a discovery process that happened with this shirt, and I'm now going to pass on some tips.
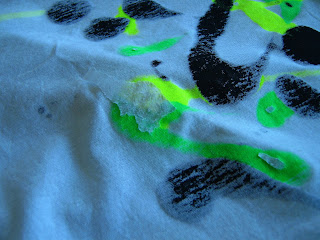
I didn't know until I unfolded the shirt the second time that the Tulip brand neon paint was actually sparkly neon paint, not just neon, which was a nice surprise. Also, next time I might do the neon first and then the black, I'm on the fence about the texture it creates from doing the neon on top of the black, which I probably should have seen coming. Oh well.
I also learned that I may have used a bit too much paint, since the it seeped through the shirt and fused the shirt to the cardboard. I think for the next attempt I'll put some waxed paper in between the cardboard and shirt, hopefully that would peel off of the paint better.
I also learned that I may have used a bit too much paint, since the it seeped through the shirt and fused the shirt to the cardboard. I think for the next attempt I'll put some waxed paper in between the cardboard and shirt, hopefully that would peel off of the paint better.
There's actually some paper still on there, despite my best efforts to peel most of it off. I'm hoping it'll come off in the wash, once that happens. Otherwise, I am really happy with my new shirt!


