Showing posts with label DIY. Show all posts

Friday, February 19, 2016

Online Making Inspiration

Avoiding the side-eye from my blog shortcut on my toolbar has been a priority lately. Even now I'm thinking "I could tackle that pile of receipts on my desk" or "I really should go through that pile of recipes." Weeks ago G was watching something on my computer and asked "What's Swimming Chickens?" I omitted some truth and just said "a blog." I was mildly ashamed of how little I'd done on it in ages that I didn't want him to read it just yet. Despite that, the enthusiasm continues to wane.

What has been poking me a bit into doing something, and why I fall into youtube holes at 2am, has been following a buttload of bloggers and vloggers. I've been known to binge on their previous content at times, ruining my sleep schedule for days because YOLO. After some hunting, I did find the other post I had done about other bloggers I follow, way back in 2011 (a banner year of 40 posts), and discovered that I do still follow some of them. One's disappeared while 2 others have lessened their postings (still better than me, so can't complain), but many, many more have been added to the list since then. The following is a super short list of the regulars.

The Youtubes...

HGTV HANDMADE
HGTV Handmade
Ignoring the current pastel thing they've got going on (don't hate, I just have a natural aversion to pastels), HGTV Handmade is super fun and inspiring. These ladies are constantly doing random challenges, themed weeks and aren't afraid to show their craft fails. They each have different styles between them which makes the videos all the more enjoyable since it's something different every week. I still follow Meg's channel, Meg Allan Cole Crafts (psst, look for a Meg-inspired home decor post soon), and I've also been recently following Karen Kavett's channel, some evidence of which you can see here.


Annika Victoria
I love Annika and I'm annoyed I didn't find her earlier. This science-loving maker does AMAZING sewing and making tutorials that are not of the "you already need several projects worth of knowledge to make this thing" variety. Her instructions are super clear and answer, she's not afraid to show off the screw ups and has a wonderful instagram that makes me want to actually sign up for instagram. Thanks to her, I finally made my own circle skirt, with a ZIPPER AND HIDDEN POCKETS. Yep. I had seen circle skirt tutorials around for ages, but there was something about how she explained it that just made it so much clearer. My hem looks awful, but I can blame me for that one. I still made a skirt with POCKETS that I wore for 6+ hours on Christmas that didn't fall apart. I have made clothing. I am eternally grateful Annika, you've fueled some realistic clothing-making confidence in me :)

If you're interested in more of Annika's stuff or don't know where to start, I would recommend her Make/Thrift/Buy series for laughs and inspiration, or her Get Thready With Me series for many more of her tutorials. She also has a new series called the Style Pyle, which is a totally stealable borrowable idea to tackle the box of randoms next to my desk. Either that or it will force me to realize I should get rid of a fair bunch of the things in that box. Finally.


Ze Blogs....

Aunt Peaches
I've been following Aunt Peaches for a while now, and she's my kinda gal... *just enough snark to make things interesting. I love her writing style too, which can be exemplified in this little bit of her about blurb; "this site was founded in 2010 as a sandbox for practicing my html skills and as an excuse to make unhealthy quantities of paper flowers. So many paper flowers."

She's a fantastically and unapologetically creative woman, painting anything that isn't (or is as the case may be) nailed down. She organizes a worldwide the Valentine's handmade card swap every year, puts flamingos on everything and is currently working on a book! I love wandering through her blog and instagram, which are explosions of colour, flowers and a cat. It's great.


Atomic Redhead
One can safely assume that I'm slightly biased towards redheads anyway, but the vintage aspects and gorgeous photos were the clinchers that caused me to binge her entire backlog in one night several years ago. The blog is filled with several covet-worthy outfit posts and Janey's love of the vintage inspired kitsch travelling. It's been worth a look for the past wee while, and I hope it will be yet.


Chronically Vintage
Jessica is just fun. She has a great rotation of outfit posts, vintage ads, vintage life and resource posts that never fail to catch my attention. Even today she posted about 10 online resources for petticoats (super handy)! I had been following her blog for ages before I realized she was actually based in Canada, which just made my little patriotic heart burst with pride.


A Bit of Both? More?

Tested
Thanks to my love of Mythbusters, I discovered Tested on youtube about 3 ish years ago. I had never really listened to podcasts (or really understood the point since I'm a troglodyte) at that point, but I got hooked on the Still Untitled: The Adam Savage Project pretty quickly. The topics range from movie, props, making, philosophy, mythbusting (or not now as the case may be) and a little bit of everything else. Even the horror movie podcast was fascinating, and gave me a list of movies I should avoid! I don't really follow the website that much, since at the time it was mostly techey stuff that I'm not too keen one, but the youtube channel is a lot of fun. Every now and again the podcast can inspire me enough to actually leave youtube alone for a few hours and make something. It's powerful stuff.


I am actually working on a project or two at the moment, and cooking more. In theory there will be posts in the near future here. I'm hoping that I can get some more oomph from the guys above this sentence and actually post them. The new family motto is "we can but try," so we'll see how things go.

Thursday, November 12, 2015

Super late Halloween decor post

While falling down a youtube hole around Halloween last year, I came across this video for this fantastically creepy and classy Halloween decor DIY by Karen Kavett on HGTV Handmade.

I actually went out the next day to get the wreath and as many cheap snakes as I could find.... which turned out to be not much, despite being Halloween season. The craft store only had big expensive ones, and dollarama (the great mecca for plastic, not always 100% anatomically correct animals) only had these weird, jelly snakes that smelled awful. I know buying them online is an option, but the lack of instant gratification of finding more snakes and the usual DIY project procrastination resulted in the parts I had collected being put away for an entire year and ignored.

If a new bid to try and actually do some half done/not done projects to clean up the stashes, I started looking for snakes again this year! I trip to Honest Ed's while killing time one afternoon got a few medium sized ones and the craft store had a multi pack of snakes that nicely rounded out my pile.


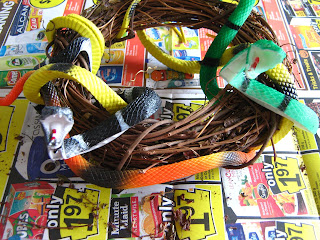
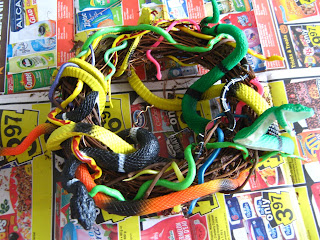
Snakey bits!More Snakey bits!

All you need is a vine wreath, a 'knot' of snakes and some spray paint.


Step 1) Arrange ALL THE THINGS. I went with Karen's advice and started with the bigger guys and filled out the bare spots with the medium and smaller snakes. With Netflix on in the background, weave all the snakes together and arrange until you're happy with how they're looking. I ended up with a few heads sticking out, which gives it personality.

They've got a good dentist, clearly.
Hey dude!
Getting there
Getting there.
Hawt
No actual snakes were harmed in the making of this wreath. Well maybe, I don't know if the hot glue gun ran one over on the way to the craft store. That would suck if it did, but I can't be held responsible for that.
Hot glue certainly helps, and thankfully didn't melt my jelly snakes (which don't smell nearly as bad a year later!)

Step 2) My wreath didn't have a hanger on the back, but some stiff wire from the stash and a healthy application of hot glue solved that problem.

Wirey


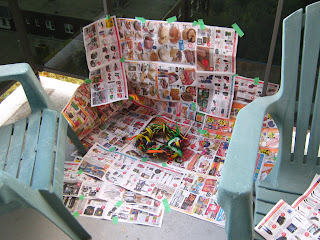
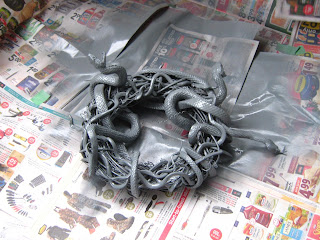
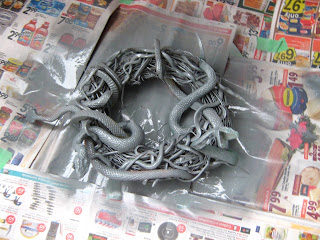
Step 3) After you prepare a spray painting area so as to not ruin your balcony floor and panels, spray paint the crap out of the entire wreath. Make sure you move it around and get it from all angles, and try to get a second coat to make sure you have good coverage everywhere. Let it dry for a good few hours if you can, but it will smell like paint for a while... and maybe make half of your apartment hallway smell like spray paint. Maybe.

It could be worse. Keeping the damage deposit intact here people.
My super sexy spray paint set up. It's outdoors with good ventilation, stop judging.
Ooo, pretty colours
Before....
Getting there....
During/First pass... 
Just a little more...
Almost there...
Step 4) Hang it up and creep people out!

Done-sky!
"Why did it have to be snakes?" Because snakes are awesome Dr. Jones. Suck it. Also, the lighting in my hallway sucks balls.
I am super pleased with how this turned out. Having it the one colour makes it kinda subtle, as much as a wreath of snakes can be, and it's creepy enough to be outside the spoopy range for Halloween. Also, this turned out to be the only thing I did for Halloween at home, so an afternoon well spent. I know I used a 50% off coupon on the spray paint, and I might have for the wreath last year, I don't remember, but I think I spent about $35 in total for the whole thing, which ain't bad for something I can creep out guests with for years to come :)

My "why I didn't 'do' Halloween this year" post will be coming up shortly, with a nice little Halloween Easter egg, and here's a bad snake pun to tide you all over.

Saturday, November 23, 2013

Celebrating the end of Halloween with snow in November.

Yep, I can post regularly to this blog. Totally.

Despite my insane new schedule (Huzzah for employment!), Halloween was a success! I finished the costume in time and managed to wear it out tot 2 parties! I'm so glad there was a second Halloween party I could go to, I spent to much damn time building that costume.

Everybody remember the stupid, sexy Little Red Riding Hood costume and the awesome T-shirt design from Threadless of "Little Red?" It all culminated in one bad Little Red, who didn't need no Lumberjack to kill that wolf.

Little Red, and a Camel.
Hello ROM camel.

Fluffy had a bad day.
He was warm at least, in death.

I'm quite pleased with how ex-Fluffy came out, even with all the issues he has. I was sewing up his butt by hand about 2 hours before we left for the ROM's Friday Night Live Halloween party, and thankfully I owned everything else already for the costume. I also learned some entertaining things about using fun fur, including that I really should have done some basting stitches along my fur and lining. There was a point around one of the paws where the lining had ridden up do far along the fun fur that I was short by about 6 inches. Also, despite being really careful and using the proper technique for cutting fun fur, there is STILL fun fur all over my apartment. 

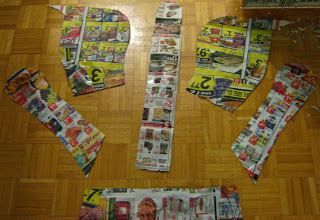
1. Ex-Fluffy was made from scratch. I used a few weeks worth of grocery flyers to draft a pattern for all of his pieces. I also spent a fair bit of time looking at wolf stats on wikipedia and pictures of real wolf hides to work out the dimensions and basic shape. Loosely speaking, ex-Fluffy is about the same size as an adult grey wolf. Anatomically wonky, but more or less correct length wise.

eff real pattern paper.
Head and arms
Bits and pieces in No Frills' flyers.

2. Cutting the pieces out resulted in some solid blisters along my thumb from the slow, careful cutting that the fun fur required. And my knees were mildly ruined by the amount of floor action I had from tracing this pattern out. Worth it though.

Who needs fabric weights?
 Trace, cut, repeat.

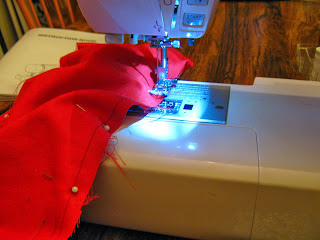
3. As I mentioned before, sewing ex-Fluffy together was a learning experience. Generally speaking it went very, very well, especially considering I haven't used a machine in a long, long time. It helps that my machine is really awesome.

Pin the crap out of it and sew.
Pins, paperclips, same basic principle.
Ronnie, hard at work.
Hand sewing and almost finished...
The tail and ears were hand sewn into the body and head. While annoying, it did create nice seams that needed minimal combing to make then invisible.

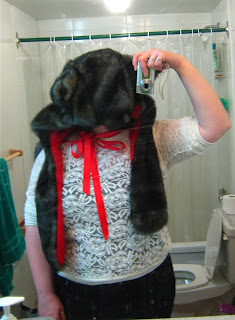
4. This awkward bathroom selfie was done about a week after Halloween, when I had time and energy. When posed, this is was the hood looked like with it's slightly uneven ears.

Ex-Fluffy returns to life!
However, when left to it's own devices, the hood proved to be a little too big..

All in all, I am super thrilled with this costume. Ex-Fluffy turned out great, and provided an extra source of warmth on the windy walk home, the dress and petticoat worked out really well to round out the costume, and I received several compliments from people at both parties. Now we just have to find a use for him... other than a wolf skin rug over the foozeball table.

Minus the shoes, the whole look.


Tuesday, May 21, 2013

Threadbanger's back! I'm a bit late to the party....

I love Threadbanger. I love their tutorials and the inspiration they give. The original Threadbanger posse of Rob, Corinne and Meg went off air for a while, and several other Youtubers came to keep the community going, which was pretty awesome. Both Corinne and Meg did their own thing and stuck around on Youtube with Craftovision and Meg Allan Cole Crafts, respectively. Now, however, Rob and Corinne are back with the old school Threadbanger!


I am pretty thrilled. So thrilled, that I clearly decided not to do anything about it until about 2 months later. They've been celebrating their return with some great tutorials for fashion recons including this fantastic Rorschach T-shirt!

Screen captioned/Stolen from the video posted below.


About 2 days after I saw this tutorial, Value Village had a half off sale, so clearly this was going to have to happen. Also, I decided it needed some neon.  This post is pretty picture heavy from now on, be warned.

Supplies:
-White or light coloured shirt,
-Black fabric paint (NOT the puffy style), and some neon colours if you want to go that route,
-Cardboard,
-Exacto knife,
-Tape,
-Iron with steam setting,

Pose awkwardly.....
Step 1: Luck out with a Value Village sale and find an old, giant, white Joe Fresh T-shirt. Feel slightly guilty about it because of recent news involving Bangladesh and Joe Fresh, but figure that you're still stopping the shirt from being thrown out and ending up in a landfill, so feel slightly better.
Feel free to model them in some awesome Leopard print leggings that you just got from Domino Dollhouse since their Astralnauts collections in now on clearance.

Maybe iron the shirt prior to this step, just sayin'
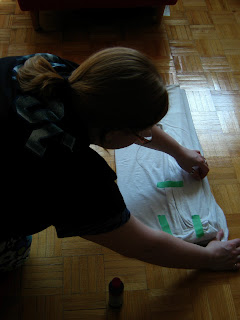
 Step 2: Find some cardboard to put on the inside of the shirt. Cut a line in the middle of that cardboard to allow it to fold in half easily. The board stops the paint from bleeding through and keeps the shirt rigid while folding it over. 

Secure all areas
 *Use some painters tape to secure the shirt since the low stick factor will allow you to peel it off safely, ish.
SECURE ALL THE THINGS!!
Step 2b): Discover that the only cardboard you have is slightly smaller than the shirt, so tape up the sleeves and bottom of the shirt to itself to get a better fit.

Let's get this party started!
Talk amongst yourselves...
keep talking
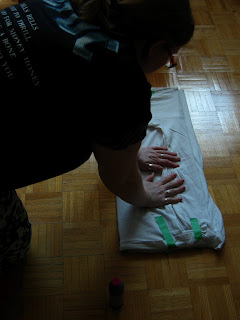
Folding time!
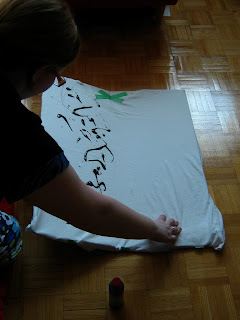
Press on the shirt more or less evenly,
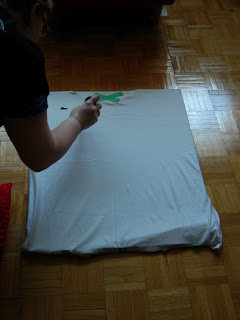
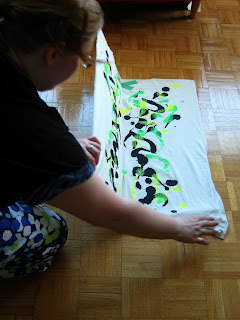
 Step 3: Shake up your first colour of fabric paint and blob some of it on one side of the shirt. Fold over and press firmly!

Peel the shirt apart again,
Ooo, pretty.
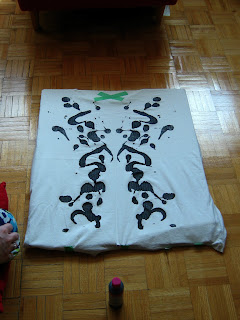
Shabam!
Step 4: Unfold and admire! From now, you can either:
a) Wait the requisite 4 hours for the paint to dry and skip to step 5, or
Repeat with Neon..
Repeat with Neon..
Repeat with Neon..
Shabam!
b) Wait the requisite 4 hours for the paint to dry and either add more of your original colour or do some more colours, repeating step 3 and 4, or
c) Do what Rob does in the video and quick dry the paint with a hair dryer on high.

Step 5: Following the instructions on the side of the paint tube, iron the well dried shirt on a steam setting to set the paint.

Pseudo direct sunlight
With a belt and a cloud cover.
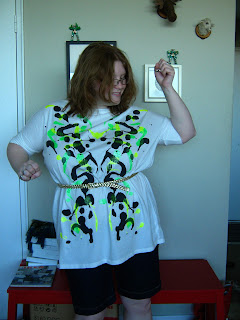
Step 6: Enjoy! Model awkwardly in a variety of poor lighting choices.


I'm pretty happy with how this shirt turned out! That being said, there was a discovery process that happened with this shirt, and I'm now going to pass on some tips.
I didn't know until I unfolded the shirt the second time that the Tulip brand neon paint was actually sparkly neon paint, not just neon, which was a nice surprise. Also, next time I might do the neon first and then the black, I'm on the fence about the texture it creates from doing the neon on top of the black, which I probably should have seen coming. Oh well. 

Funky Textures and patterns.

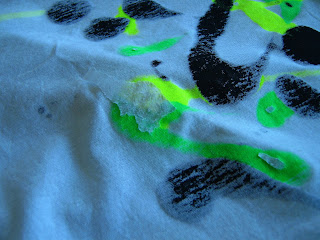
I also learned that I may have used a bit too much paint, since the it seeped through the shirt and fused the shirt to the cardboard. I think for the next attempt I'll put some waxed paper in between the cardboard and shirt, hopefully that would peel off of the paint better.

Well that's not good.
Freakin' paper

There's actually some paper still on there, despite my best efforts to peel most of it off. I'm hoping it'll come off in the wash, once that happens. Otherwise, I am really happy with my new shirt!