Several weeks ago while trolling through my usual list of blogs, and came across this wonderful cardboard box decor tutorial from How Joyful.
Joy's boxes are custom jobs with some pretty fabulous wrapping paper she found. Love the labels too!
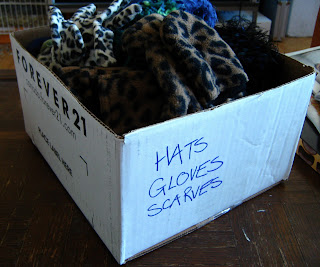
Last week I was wandering through Dollarama ad found some "duct tape" in a Zebra ish pattern. I use the quotes since I'm relatively certain it's not real duct tape from the brand. And I say Zebra ish since it's stripey but not quite like a Zebra. Whatever. I bought a roll of it and decided to spruce up my winter accessories box in the coat closet.
Our very utilitarian front hall coat closet. Yep. The jean machine bag is holding my roommate's two gerbil balls that try to escape frequently.
Step 2: Start taping. Depending on your design, you can line it up to continue the pattern. I did the front and both sides and left the back uncovered. I figured the other three sides were more likely to be seen in the long run.
Step 3: Run out of tape as you get to the last row that needs to be done. My previous self saw this coming since the roll was pretty thin, but for some reason, did not buy a second roll.
Step 4: After returning to Dollarama to discover that they have run out of the design you're using and won't be getting more for another two weeks, pick up one of the two neon rolls that are left. Using this as a complimentary colour (like you had planned all along), do the top roll of the box. The neon is a bit see-through, and even with two layers you can still see thick black lettering through it. No matter, since that will be on the sides. Also, use your previous gift wrapping job experience to make the corner fold nicely to look flat and neat.
SHABAM! Leopard and Neon winter accessories box.
If you look closely you can see where the tape meets, but I don't think it affects the overall pattern.
Looks nice eh? It's something a little fabulous in the closet.


