Showing posts with label Food. Show all posts

Sunday, May 20, 2012

Cooking and Planting

So it's been a while since I've posted. I'd like to blame school but I can't really do that anymore since classes are over. I'm still writing my first draft for the the thesis, so that sort of counts. The nice things about classes and Bedford being over is the amount of real cooking I've been doing! It's been glorious.

This past week I made a dish involving several ingredients I either don't use a lot or have never tried to use. The results was pretty fantastic, and even the leftovers were good for days! I found the recipe in the Longos Experience Magazine, which can usually be found in the LCBO Food & Drink Magazine. I love honey crisp apples, but I've never really put them in much other than pies and crisps, and this was a great way to experiment with them in a main course for dinner!


Chicken and Apple Salad in Phyllo Cups
Makes 8 servings.
Ingredients
2 cups of diced cooked chicken
1 apple (Pink Lady, Honey Crisp or Cortland), cored and finely chopped
1/2 cup plain yogurt
1/3 finely chopped radish
1/3 finely chopped celery
1/4 diced red onion
1/4 cup of mayonnaise
2 tbsp chopped fresh tarragon (I used a 1/4 tbsp of dried tarragon, and that was more than enough. It's pretty strong stuff)
1 tbsp dijon mustard
1, 1/2 tsp lemon juice
Pinch or salt and pepper
1/4 -1/2 cup of melted butter
5 sheets of phyllo dough


Phyllo cups:
-Brush muffin pan with some of the melted butter and set aside.
-Place one sheet of phyllo on work surface and brush with melted butter. Top with another sheet of phyllo and brush with butter. Repeat with remaining sheets. Using a sharp knife, cut phyllo stack into 8 squares.
-Take each square and press into muffin pan. Bake at 350 F/ 180 C for 8 to 10 minutes or until lightly browned. Remove from oven and let cool completely.
Note the lack of squares in this instance...
-Meanwhile, in a large bowl, combine chicken, apple, yogurt, radish, celery, onion, mayonnaise, tarragon, mustard and lemon juice. Season with salt and pepper to taste, and divide amongst the baked phyllo cups.


I completely forgot to add the yogurt to this recipe and it tasted great anyway. The phyllo loses its crispiness in the fridge over night, but they still perfectly edible.


To celebrate the opening of gardening season here in Canada, and even though I can't get on my balcony yet due to the construction, I decided to break out the upside down tomato kit that my roommate gave me for my birthday this year.

It does seem to have a few problems, chiefly being that the "lid" that snaps on the top doesn't actually snap to anything. I taped the hell out of it for now, and once I turn it over that hopefully won't be a problem. We'll see. They're on the windowsill for now, and we'll check back in 2 weeks to see if they've sprouted.


Tuesday, September 13, 2011

Pie before Class

I started class today, and to celebrate (dash put off the thought over the weekend), I made some peach pie on Saturday! I have always had issues which pastry, and have had some major pie disasters over the years, so prior to starting I called my mom and got a few extra tips on her recipe that I've been trying to use. I think my chief improvement was to put the dough in the fridge while I was working on the fruit since my kitchen is hot and humid at the best of times. Also, much to most people's taking issue with, I use real lard, not Crisco. Hate the stuff, real lard is the only way to go.

Fruit Pies

Pastry

2 cups of all purpose flour
1 tsp of baking powder
1 tsp of sugar
1 tsp of salt

-Combine all these dry ingredients in large bowl and mix well.
-Add 1/2 pound of lard (half of the box), and cut it in with two butter knives. Flake with hands until crumbly.
-Mix 1 egg with 1/2 cup of cold water, and dribble small portions onto dough until it starts to stick and can be formed into a ball.
-Place dough unto saran wrap, cover and place in fridge for the meantime.


Filling

4 cups of fresh fruit, sliced/cut
1/4 flour (less)
1/2 - 3/4 cup of sugar

Combine the above ingredients in another bowl and toss to combine.


Some assembly required

-Remove dough from fridge and divide in half.
-On floured surface with floured rolling pin, flatten and roll dough to an even, less than 1/2 a cm thick area big enough to cover the pie plate (I use a wonderful pyrex pie, casserole dish, screw aluminum). I've been able to take a floured butter knife and slide it under part of the dough to loosen it from the counter, at which point I can stick it to the rolling pin a bit and roll it around the rolling pin. It sometimes makes it easier to transport the dough to the pie plate 4 inches away. For the first time ever I was able to get both the bottom and top pieces of the pie unto the damned plate in one piece.
-Once the bottom layer of the dough is in the plate, add the fruit filling, spreading to create an even layer.
-Add top layer of dough. Pinch the edge to seal. Cut vent holes throughout the top layer in a desired design. In my case, a squirrel. I happened to have a squirrel cooking cutter lying around in my kitchen drawers, and figured it would help bring in the fall.

-Bake in a 425 degree oven for 10-15 minutes. At the 10-15 minute mark, turn the pie around and reduce temperature to 375, cook for another 20-35 minutes.
*Pies can bubble over and leave filling all over the oven that burns and smells awful. To avoid this, have a pizza pan or cookie try in the oven while the oven is preheating, and place the pie plate on this. The preheat will allow the heat to distribute evenly and protect your oven's floor from burning peaches.
-Keep half an eye on it has it bakes; it will be done as the upper crust turns a light shade of brown around the edges and the exposed filling in the vent holes bubbles.
-Remove from oven, allow to cool for at least 15 minutes prior to cutting and eating. The first few pieces will disintegrate entirely when being removed from the pie plate, but that's just a sign of a pie well done. When fully cooled, slices come out in one piece, ish.

Monday, August 1, 2011

A variety of things


Happy Civic Holiday! or Simcoe Day! or BC day! and a variety of other names this August long weekend seems to have. It's Simcoe Day where we are. So far as I'm concerned, it's a day to clean this place up.

My apartment's a bit of a disaster. Not even close to one by other people's standards, but both my roommate and I are working long, 9-5 days at the moment, so we haven't swept, vacuumed or put things away with any enthusiasm in a long time. We did get a start on that yesterday, since while I was at a baseball game, she was at ikea with a friend and got some great shelving units for our kitchen and linen closet for more space and organization. Pictures to come.

I've been doing some cooking lately, nothing too exciting though. This week has been very repetitive and boring by way of cuisine. That being said, I have discovered an amazingly easy recipe for dumplings, something I have never made before. This is another Kitchn find, and is so quick and easy to make. I may have to start keeping ricotta in my fridge on a regular basis, since it makes a good quick dinner. It's always a little different each time since I vary the herbs each time too!

Original recipe here.

Ricotta Dumplings with Chèvre and Herbs!
serves 2 generously as a main dish, or 4 as a side dish

Ingredients:
1/2 cup part-skim ricotta cheese
2 large eggs
1 1/2 cups flour
3/4 teaspoon salt
Freshly ground black pepper
2 tablespoons of water, as needed
2 tablespoons unsalted butter
Handful fresh herbs (rosemary, flat-leaf parsley, sorrel, mint, thyme, or combination thereof)
2 ounces fresh chèvre


Place a 3-quart (or larger) saucepan of water over high heat. Salt generously and bring to a boil.
While waiting for the water to boil, whisk together the ricotta and eggs. Add the flour, salt, and a sprinkle of fresh black pepper. Mix together quickly and lightly with a spoon. If the dough is too thick and floury, add 1 to 2 tablespoons of water. 

Turn the dough out onto a floured countertop and quickly pat it out. (Don't add too much flour; these will be just slightly sticky.) Pat the dough out until it is about 1/2-inch thick, and cut into 1-inch squares. Using a pizza cutter that had been dipped in flour every couple of cuts works really well.

Drop these little squares into the boiling water and cook for 2 to 4 minutes, or until they float to the top and are fully cooked inside. Remove them from the water with a slotted spoon. 

Pour the water out of the pan and place back over medium heat. Melt the butter in the pan. While the butter is melting, chop the herbs roughly. When the butter has melted, add the herbs and cook for just a few seconds, stirring them until fragrant. Turn off the heat and add the cooked dumplings back to the pan. Toss with the herbed butter. Add the goat cheese in small dollops and toss.
Serve immediately. 

 Makes for some great leftover lunch the next day too!


In other news, vacation update! My friend and I were up late a few nights ago and found a great travel deal that was hard to pass up, 75% off is hard to argue with. So, as a result, we're going from Toronto to Vancouver by Train!!!
See that big, long red line? That's us for four days!!

We each got a one-person room which included all of our meals on the trip for a fraction of what the room would normally cost. We're also spending a few days in Vancouver upon arrival and the flying back to Toronto. Back to the homeland I go!

Wednesday, July 27, 2011

Corn Bake and Cottages

So I'm still working on this regular posting idea. We'll get there.
In other news, we had a fabulous time at the cottage this past weekend. The weather couldn't have held out better for us and the food was plentiful. $240 for five people's worth to be slightly more exact. And don't think we wasted any of it. All that's left that didn't come home with us is a box of fudgecicles that we left as a gift to the next occupants. They certainly weren't going to make the car trip back home, so in the freezer they stayed.


The above is about all the digital photos I took over the weekend. I brought my film camera and used that for most of the trip. Once all the rolls are developed, I may scan some of the pictures and put them up here, depending on how they turn out.

Once I got back I had a quick look at the finances and re-discovered that I'm still broke. Time to get creative with the menu again. I happened to have had two cans of corn in the pantry for a long time (do they expire? It doesn't say anywhere on the can...), and found this fabulous recipe for a cheesy corn bake on The Kitchn website! Works for me. I
used half of the red pepper since I discovered part of the one I had was a bit funky on the inside. I then substituted the rest of it with some chopped mushrooms I had lying around, throwing them in with the peppers.


Cheesy Corn Bake

Serves 4 - 6


1 red bell pepper, diced
2 tablespoons unsalted butter
3 tablespoons flour
1 cup milk 
1 cup freshly grated cheddar cheese
2 tablespoons cream cheese
1 teaspoon kosher salt
Pinch of cayenne pepper
4 cups corn, fresh or frozen*
1-2 green onions (I sprinkled them on before serving as a garnish and a hint of the crisp, as the cooking reality shows are saying these days)


Preheat oven to 375°.


Sauté bell pepper in a little bit of olive oil over medium to medium high heat. Set aside. 

In a heavy sauce pan, melt butter on medium-low to medium heat. Add flour and whisk until smooth (and the flour taste is cooked out), about three minutes. Pour in the milk and cook, constantly stirring, until very thick. Mix in cheddar and cream cheese and stir until melted and creamy. Remove from the heat and season with salt and cayenne. 


Combine the cheese sauce, red pepper, and corn in a large bowl. Taste and add more salt and pepper, if desired. Pour into a baking dish, cover and bake until hot and bubbly, about 35 minutes. You can remove the cover for the last 10-15 minutes to bubble it a bit more.


*If using frozen corn, steam and drain it before adding it to the recipe.
 Oh yes. So much cheese. So good.

Friday, July 15, 2011

Slight twist

I really do need to update this more often, or at least consistently at specific times. Maybe once a week, I could probably handle that.

Moving on. I had the rest of the week planned so far as dinners go, except tonight for some reason. So, a-scavenging I go! I had wanted to make my paneer potato fry-up, as posted here, and here (sort of), but not had I run out of onions and potatoes, my leftover paneer was decidedly funky. So, I used a spare sweet potato I had from a pizza recipe I tried earlier.

In other news, My mom and I went to the Aberfoyle Antique Market over the weekend! I love this place, it's a great combination of antiques and flea market finds. The prices are fairly reasonable throughout, and you can always find something, as can be shown by most of my antique camera collection. I didin't get too much this year, but I did find some tintypes in really good shape. They were super cheap so I got two! I also found these.
I think I'm good, but they did seem well priced.

In other, other news, a few of us are heading up North to Muskoka for a weekend at the cottage. By 'the' cottage I mean my friend's co-worker's cottage, who kindly rents it to us during the summer. There will be photos of the obscene amount of BBQ that happens over the weekend to come.

Sunday, June 26, 2011

Weekend Breakfast

A lazy weekend was had by all. Sleeping in, reading/finishing a book I've been reading, and wandering by the grocery store. It was started with this scrambled eggs and avocado recipe I found on the Toronto Star website. Since I didn't have any crème fraîche, I just put some table creme in with the eggs.

Avocado Scramble on Toast (Makes 1 serving.)

Ingredients
1/2 avocado, sliced
Juice of 1/2 lime
2 eggs
1 tbsp (15 mL) crème fraîche
1 slice bread, toasted
Freshly ground black pepper

What to do
In small bowl, mash avocado slices and lime juice with fork.
In another bowl, whisk eggs and crème fraiche.
Heat small, non-stick skillet over medium. Add eggs. Cook, stirring in figure eight pattern with wooden spoon, until just scrambled and still moist.
Spread avocado on toast. Top with eggs. Season with pepper.

Sunday, June 19, 2011

Spinach Pasta and a Puppy

I started my internship at the Hockey Hall of Fame about 2 weeks ago, and when I spend some of my days digitizing, I spend a lot of time looking up recipes. I drafted up a menu for the rest of the week using new, found recipes almost all week! Yesterday, I started it off with Herb and Spinach pasta from Canadian Living.

This recipe is alarmingly easy to make, even by my standards.

Ingredients

    1 pkg fresh spinach, shredded 3 cloves garlic, minced 1/2 tsp (2 mL) pepper 1/4 tsp (1 mL) salt 12 oz (340 g) linguine 1/2 cup (125 mL) minced fresh chives 1/3 cup (75 mL) chopped oil packed sun dried tomatoes 2 tbsp (25 mL) extra-virgin olive oil 1/3 cup (75 mL) grated Parmesan cheese

Preparation:

In large bowl, combine spinach, garlic, pepper and salt ; set aside.
In large pot of boiling salted water, cook pasta until tender but firm, about 8 minutes. Drain, reserving 3/4 cup (175 mL) of the cooking liquid.
Add pasta and cooking liquid to spinach mixture; toss until spinach is wilted. Add chives, tomatoes, cheese and oil; toss to coat.
*I recommend putting a lid or plate over the bowl you're mixing the pasta
 and water in to allow the water to soak in a bit more; it's a bit drippy otherwise.


Last night was also a housewarming party for a old friend of mine that was back in Canada after a year abroad in New Zealand. He celebrated the new place by getting a puppy. Betty was the center of attention for the evening, sorry Mike! She doesn't like holding still, and would even when sleeping would wake up before someone had a chance to take a picture. Video is the best I could do.
 
Ain't she a cutey?

Monday, June 6, 2011

Insomniac!

I know it's only midnight or so, but I didn't sleep, at all, last night and I'm struggling to fall asleep now. So, I thought I would decorate my lunch to pass the time.
This was loosely inspired by this post on Craft website back at Easter, which I desperately wanted to try, but never got around too. I don't even own a phone capable of having Angry Birds, I steal my friend's phone on occasion.

Saturday, June 4, 2011

I'm Back!!!

I am back from Paris! The jet lag is over with, most of the pictures are on my computer and the suitcase has been more or less unpacked. My friends and family tell me that they did get their postcards, so most of them arrived before I actually came home! Also, one of the girls on the trip sent me one, so I had a lovely, vintage reminder about my trip waiting for me a few days after I got back.


Now all I have to do is go through the 2000+ photos and notes to write my journal for my final project!
*sigh

It's a lot of porn/art to sift through, but somebody has to do it. Here's a small selection for the great wide web.


This is a wonderful place called the Albert Khan Museum and Gardens. He was a pretty cool (and rich) guy that wanted a record of the world. As a result, he commissioned a little over 72,000 autochromes to be taken of people, places and things. Autochromes are some of the first colour photographs, and are unbelievably stunning to see in the flesh. They are also fairly hard to get a hold of in North America, so seeing as many as we did here, and at other collections is pretty insane.
The gardens at the museum are really beautiful, they're filled with ponds and little waterfalls that block out the noise and smell of downtown Paris.
These autochromes are from the Société Française de Photographie's collection. Note the early, colour "art" (ie porn) on the left. They've held up beautifully, especially being about 100 years old.

We lucked out while we were there, since not only was it International Museum Day, Paris was having a "Night at the Museum" evening, where admission was free to several museums and galleries! Most were also open later than usual, closer to midnight. The Paris Museum of Natural History was the one my buddy and I went to. They like their bugs and lack of decent lighting on their exhibit cases. Despite that, it was really cool!
This is the minor issue with glass plates, occasionally they don't make it from one place to the other very well.
Don't think we didn't go flea marketing! This is one of the many, many flea markets in the larger area of Saint-Ouen. We got some amazing photographs, including autochromes, and spent well too much money. So far as souvenirs go, they're pretty awesome. I have some great cabinet cards of the Arc de Triomphe and the Saint-Michel fountain.

We spent many an evening and afternoon picnicking on the Pont des Arts. Nice view eh? We had a picnic dinner on the lawn outside the Eiffel Tower one evening. As the evening goes along, the tower starts lighting up, and than at 10pm, the sparkly, twinkling lights turn on. A very nice backdrop for some cheap wine, smoked salmon and a lot of cheese and baguettes.


I have a lot of photos to go through, and I have every intention of posting some of the food pictures  I have of the picnics and escargots.

Tuesday, May 3, 2011

Poutine

I have very little for today, other than this slightly bad picture of poutine we had in Montreal on a road trip last week. It was amazing, greasy and cheese filled.

Thursday, April 21, 2011

More eggs. And paneer.

I had some leftover paneer, half an onion and some potatoes lying around. Time for a fry up!

Boil the potatoes in small chunks until soft, drain.
Slice onions into thin slices, throw into frying pan on medium heat with some veggie oil. Stir.
Add potatoes. Stir.
Add 1/2 teaspoons of coriander seed, cumin and turmeric. Stir.
When onions are almost cooked, throw in cubed paneer and stir until either warmed through or slightly brown and crisp on the outside.
Remove potato mixture, crack on egg into the pan and attempt to do an over-easy egg. This doesn't always work well for me, so I'll take what I can get.
So glad that last essay is over. So glad, in fact, that I'm using some of the notes to protect my keyboard from splatter while eating at the computer. I'm not a *huge slob, but stuff falls off of forks occasionally. It's interesting that everything that was white when the cooking started, ended up being yellow, predominately due to the turmeric. Eggs just do that on their own.
It's also interesting to note that most of my posts are well after the midnight mark. Might have to do something about that along the way.

Tuesday, April 19, 2011

"It's a good thing."


 I'm done my first year. I am so tired. Slightly dead.

To celebrate, we had a pot luck party on Friday to pre-celebrate the end of the year. Most people were planning on bringing beer and chips, but since I had the day off ahead of the party, I made apple cupcakes! This recipe is from Martha Stewart's website, the buttercream I used is a homegrown recipe of butter, vanilla and icing sugar.

Apple cupcakes topped with a generous amount of brown-sugar buttercream make an appealing finale. If desired, top with tinted fondant leaves.
  • Yield Makes 2 Dozen

Ingredients
  • 2 1/4 cups all-purpose flour
  • 2 teaspoons baking soda
  • 2 teaspoons ground cinnamon
  • 1/2 teaspoon ground nutmeg
  • 1 teaspoon salt
  • 1/2 cup (1 stick) unsalted butter softened
  • 2 cups sugar
  • 2 large eggs
  • 1 teaspoon pure vanilla extract
  • 4 cups coarsely shredded apples such as Macintosh (about 1 3/4 pounds)
Directions
  1. Preheat oven to 350 degrees. Line 2 standard muffin tins with paper liners; set aside. Whisk together flour, baking soda, cinnamon, nutmeg, and salt in a medium bowl; set aside.
  2. Put butter and sugar into the bowl of an electric mixer fitted with the paddle attachment; mix on medium-high speed until pale and fluffy, about 5 minutes. Mix in eggs and vanilla. Reduce speed to low; mix in apples. Add flour mixture; mix, scraping down sides of bowl as needed, until just combined.
  3. Divide batter among lined cups, filling halfway; bake until tops are springy to the touch, 18 to 20 minutes. Remove cupcakes from tins; transfer to a wire rack; let cool completely.
  4. For fondant leaves: To tint the fondant the desired color, use a toothpick to dab on food coloring, and then knead it in with your hands. Roll out the fondant to 1/4 inch thick, and dust with confectioners' sugar to prevent sticking. Cut out shapes with a 2-inch leaf-shaped cutter. Gently press the backside of a knife down the center of each leaf to create a vein. Bend leaves slightly and place in an empty egg carton to shape. Let the leaves dry overnight. For 24 cupcakes, you will need 1 pound of fondant. If you're like me, you'll ignore this step and just top the cupcakes with buttercream.

Saturday, April 9, 2011

A few things.. mostly school

So... tired... more papers... to.. write.
The end is near. Or at least it better be if I plan to survive my first year of grad school.

On the food front. We went to One of  a Kind again! The spring show was last weekend, and my roommate and I loaded up of food, more so then any other year.

Me:
Asiago and garlic shortbread cookies by Coach House
Maple fudge by Bruce County Nut and Fudge Co.
Olive Hummus and herbed pita chips by Sun Sweet Catering
Salmon pate (sooooooooooooo good) by The Fishery

Her:
Garlic spread, also by Sun Sweet Catering. They do great stuff, 8 different kinds of hummus too.
Salmon pate, see above.
Hot pepper oil (which is actualy hot in Carribean standards) by the Wicked Gourmet
Mango salsa by I'll have to get to you on that one... sorry!

The lovely ladies from Bbj were there this year too! Got myself a lovely Greta Garbo magnet, one of Audrey Hepburn and my roommate got a unicorn dancing on a rainbow that says 'Super Gay!' It's pretty fabulous. I bought a beautiful screen print of antique cameras, and when I'm back at home with the thing in front of me, I'll tell you who made it. Sometime the OofaK website isn't as helpful as it needs to be.

I also pass by this booth every year, and have had to stop myself from buying her stuff recently. I have 4-5 books already that have nothing in them, so until I start writing in them, I can't buy anymore. We'll see how long that lasts. I have two plans for books that I already have of hers.
Plan a) a food journal. I eat fairly well health wise, but my portion control has never been good. Maybe the tedium of writing it all down might aid me in keeping track and realizing how much I put back.
Plan b), and very much actually going to happen is my journal for Paris. We are required to produce a journal of the happenings and trips we take on the Paris course, and for the rough notes I carry around with me, I'm thinking one of her journals would be perfect! They're spiral bound so I can roll them over to be just one side and are compact enough to be light in the purse, in which space will fast become a premium. I have one that's title is "Mutiny in the Bay." Seems perfect.
Speaking of Paris: 28 days to go!

On a separate note, April is National Grilled Cheese Month... sure, whatever, works for me! Need to get some stuff to celebrate with!

Wednesday, March 9, 2011

Happy Fat Tuesday!!

It's a bit late, but I think I'm just turning into a night person anyway. Nonetheless, pancakes!

Ingredients for my Mom's homemade pancakes
(makes a lot, about a week's worth f breakfast if you're eating about 2-3 a day)

Wet:
2 1/2 cups of Milk
1 egg
2 tbls melted butter

Dry:
2 cups of Flour
4 tps of Baking Powder
2 tbls of sugar
pinch of salt.

-Mix together dry ingredients in one bowl, and the wet ingredients into another, preferably the container you plan to store the batter in.
-Mix the dry into the wet in small batches. Stir thoroughly to eliminate lumpy bits.
-Place batter in the fridge over night.
-To cook, heat non-stick frying plan on medium heat. Stir the batter once more before use. Ladle out batter unto centre of the pan and tilt the pan to allow excess batter to fall over edges of pancake. Cook to desired doneness (it's a word now, get over it), and serve. 
*Fruit in the batter should not be stored in the batter overnight. It's much better to have it freshly put into the batter, and just as you pout the patter into the pan. I threw strawberries on today's serving because I had them and had forgotten about them until I opened the fridge again for the Maple Syrop.

Monday, March 7, 2011

Risotto!

I actually made risotto. Yep.


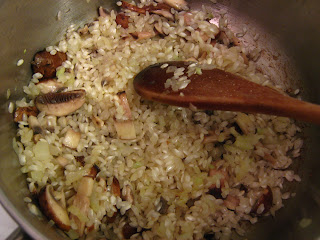
I consider this a hard recipe in the sense that I've heard some horror stories about how easy it is to screw up. Once again, I must thank Canadian Living for the recipe! I added mushrooms, they weren't there originally, but I think they make it better.


By The Canadian Living Test Kitchen
roll over and click star to rate
ating starating
 starating
 starating
 starating
 star
This recipe makes 4 servingsTop of Form
Ingredients
2 cups vegetable broth 2cups cups(500 mL) (500 mL) vegetable broth or sodium-reduced chicken broth
2 tbsp butter 2tbsp tbsp(25 mL) (25 mL) butter
1 tbsp olive oil 1tbsp tbsp(15 mL) (15 mL) olive oil
1 large shallot , (or half small onion)diced1large shallotshallots, (or half small onion) diced
1 small clove garlic , minced1small clove garlic, minced
1/4 tsp salt 1/4 1/4tsp tsp(1 mL) (1 mL) salt
1-1/2 cups arborio rice 1-1/2 1-1/2cups cups(375 mL) (375 mL) arborio rice
1/2 cup white wine 1/2 1/2cup cup(125 mL) (125 mL) white wine
4 oz smoked cheese , (such as provolone, mozzarella or Gouda),shredded4oz oz(113 g) (113 g) smoked cheese, (such as provolone, mozzarella or Gouda), shredded [I used smoked Gruyere, works great for this recipe!]
1/4 cup grated Parmesan cheese , (approx)1/4 1/4cup cup(50 mL) (50 mL) grated Parmesan cheese, (approx)
2 tbsp minced fresh chives 2tbsp tbsp(25 mL) (25 mL) minced fresh chivefresh chives or parsley
4-5 mushrooms of choice, either White button or Crimini are good, chopped 
Preparation:
In small saucepan, bring broth and 2-1/2 cups (625 mL) water to boil. Reduce heat to low and keep warm.

In large saucepan, heat 1 tbsp (15 mL) of the butter and oil over medium-high heat; saute shallot, garlic and salt until softened but not coloured, about 3 minutes. Chuck in mushrooms and stir.

Add rice, stirring to coat and toast grains. Add wine; cook, stirring, until almost no liquid remains.

Begin adding 4 cups (1 L) of the broth mixture 1/2 cup (125 mL) at a time, stirring after each addition and letting rice absorb most of the liquid before adding more, about 20 minutes in total. Taste before adding last cup (rice should be loose, creamy but not mushy and still slightly firm in centre).

Add smoked cheese and remaining broth mixture; cook, stirring, until smooth. Remove from heat. Stir in Parmesan cheese and remaining butter. Sprinkle with chives, and more Parmesan if desired. 
Cool eh? Check out my attempts to be fancy by adding a flourish of green onions. 
Soooooooooo good. Really pleased with how this turned out. Keeps well in the fridge as well.

On a side note, two of my friends got married recently. We're all quite thrilled and proud of them for tying the knot. And for providing a sushi free-for-all as part of the reception. It also provided my new favorite quote about sushi. The groom and his family are East-Indian/Trinidadian and the bride's is Chinese. The groom loves his Chinese and Japanese food, specifically sushi, but it's not for everyone.

Groom's friend: Dude, do your parents even like sushi?
Groom: No. But they're gonna!
 Congratulations Keith and Sally!! All the best for the future! 

Saturday, February 19, 2011

Spring Rolls and Reading Week.

A break has come. I'm on my reading week as of Monday. I don't count the weekends since I work 9-5 Saturday and Sunday. Can't have it all can you? At the very least, it means time to cook!

To celebrate, I tried a spring roll recipe I found in the recent issue of Canadian Living. They were nice enough to put it online as well, so here it is!


Shrimp Spring Rolls!
Shrimp Spring Rolls
By Andrew Chase and The Test Kitchen
 
Ingredients:
1 lb frozen shrimp, thawed, peeled and deveined

1 can (227 mL) water chestnuts, drained and chopped

1 green onion

1/4 cup chopped cilantro

1/2 tsp finely grated fresh ginger

1/2 tsp salt
1 pinch white pepper

16 square spring roll wrappers

1 egg, beaten

Vegetable oil, for frying

 
Dipping Sauce:

3 tbsp rice vinegar

2 tbsp water

1 tbsp julienned fresh ginger

2 tsp granulated sugar

1/2 tsp minced seeded hot red pepper 

1 pinch salt

Preparation:
Dipping Sauce: In small bowl, stir together vinegar, water, ginger, sugar, hot pepper and salt until sugar is dissolved. Set aside. 


On cutting board, cover shrimp with plastic wrap and, using bottom of saucepan, smash until flattened and broken up; transfer to bowl. Add water chestnuts, onion, cilantro, ginger, salt and pepper; mix well.


Lay 1 spring roll wrapper on work surface with point up; shape 2 tbsp shrimp mixture into 3-inch (8 cm)long log across bottom third of wrapper. Roll up, folding in sides, until only 1-inch (2.5 cm) triangle of wrapper remains. Lightly coat triangle with egg; roll up. 

Repeat with remaining filling and wrappers. (Make-ahead: Refrigerate for up to 2 hours.)


In heavy-bottomed skillet, heat 1/2 inch (1 cm) oil over medium-high heat just until ripples appear; reduce heat to medium. 

Skimming oil between batches, fry spring rolls, turning and increasing heat if necessary, until golden and filling is pink in centre, 3 to 4 minutes per batch. Drain on paper towel–lined plate. (THEY DO NOT TAKE THIS LONG TO COOK. 30 seconds per side seemed to be more than enough) Serve with Dipping Sauce

 
I was pleasantly surprised by how easy this recipe was and they were so tasty! Instant (and better) Chinese food! You can also use the leftover egg for a single egg plate of scrambled eggs or a tiny omelet. Also, smashing shrimps with a frying pan is fun, and a good way to get your roommate out of her room, wondering what the hell you're doing.