Tuesday, May 21, 2013

Threadbanger's back! I'm a bit late to the party....

I love Threadbanger. I love their tutorials and the inspiration they give. The original Threadbanger posse of Rob, Corinne and Meg went off air for a while, and several other Youtubers came to keep the community going, which was pretty awesome. Both Corinne and Meg did their own thing and stuck around on Youtube with Craftovision and Meg Allan Cole Crafts, respectively. Now, however, Rob and Corinne are back with the old school Threadbanger!


I am pretty thrilled. So thrilled, that I clearly decided not to do anything about it until about 2 months later. They've been celebrating their return with some great tutorials for fashion recons including this fantastic Rorschach T-shirt!

Screen captioned/Stolen from the video posted below.


About 2 days after I saw this tutorial, Value Village had a half off sale, so clearly this was going to have to happen. Also, I decided it needed some neon.  This post is pretty picture heavy from now on, be warned.

Supplies:
-White or light coloured shirt,
-Black fabric paint (NOT the puffy style), and some neon colours if you want to go that route,
-Cardboard,
-Exacto knife,
-Tape,
-Iron with steam setting,

Pose awkwardly.....
Step 1: Luck out with a Value Village sale and find an old, giant, white Joe Fresh T-shirt. Feel slightly guilty about it because of recent news involving Bangladesh and Joe Fresh, but figure that you're still stopping the shirt from being thrown out and ending up in a landfill, so feel slightly better.
Feel free to model them in some awesome Leopard print leggings that you just got from Domino Dollhouse since their Astralnauts collections in now on clearance.

Maybe iron the shirt prior to this step, just sayin'
 Step 2: Find some cardboard to put on the inside of the shirt. Cut a line in the middle of that cardboard to allow it to fold in half easily. The board stops the paint from bleeding through and keeps the shirt rigid while folding it over. 

Secure all areas
 *Use some painters tape to secure the shirt since the low stick factor will allow you to peel it off safely, ish.
SECURE ALL THE THINGS!!
Step 2b): Discover that the only cardboard you have is slightly smaller than the shirt, so tape up the sleeves and bottom of the shirt to itself to get a better fit.

Let's get this party started!
Talk amongst yourselves...
keep talking
Folding time!
Press on the shirt more or less evenly,
 Step 3: Shake up your first colour of fabric paint and blob some of it on one side of the shirt. Fold over and press firmly!

Peel the shirt apart again,
Ooo, pretty.
Shabam!
Step 4: Unfold and admire! From now, you can either:
a) Wait the requisite 4 hours for the paint to dry and skip to step 5, or
Repeat with Neon..
Repeat with Neon..
Repeat with Neon..
Shabam!
b) Wait the requisite 4 hours for the paint to dry and either add more of your original colour or do some more colours, repeating step 3 and 4, or
c) Do what Rob does in the video and quick dry the paint with a hair dryer on high.

Step 5: Following the instructions on the side of the paint tube, iron the well dried shirt on a steam setting to set the paint.

Pseudo direct sunlight
With a belt and a cloud cover.
Step 6: Enjoy! Model awkwardly in a variety of poor lighting choices.


I'm pretty happy with how this shirt turned out! That being said, there was a discovery process that happened with this shirt, and I'm now going to pass on some tips.
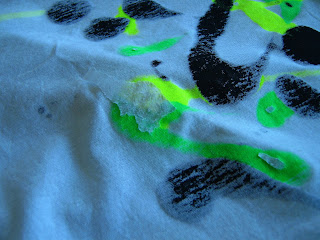
I didn't know until I unfolded the shirt the second time that the Tulip brand neon paint was actually sparkly neon paint, not just neon, which was a nice surprise. Also, next time I might do the neon first and then the black, I'm on the fence about the texture it creates from doing the neon on top of the black, which I probably should have seen coming. Oh well. 

Funky Textures and patterns.

I also learned that I may have used a bit too much paint, since the it seeped through the shirt and fused the shirt to the cardboard. I think for the next attempt I'll put some waxed paper in between the cardboard and shirt, hopefully that would peel off of the paint better.
Well that's not good.
Freakin' paper

There's actually some paper still on there, despite my best efforts to peel most of it off. I'm hoping it'll come off in the wash, once that happens. Otherwise, I am really happy with my new shirt!

Sunday, May 5, 2013

Thai chicken and coconut milk soup

It's been a busy few weeks since I last posted, helped along by the really lovely weather we've been having in the Tdot lately. A fair amount of last minute stuff happened surrounding the PHSC Image Show last Sunday, and the show itself went quite well. Since then I've finally had a bit of time to myself to actually plan out and make some of my own meals again. My local Loblaws has been taunting me lately with some lemongrass stalks, and I finally decided to take to the plunge and actually make something with them. I'm sure why I put it off for so long, although it probably had a bit to do with the fact I was always reading varying ways of how to treat it properly when using for cooking.

Thai Chicken and Coconut Milk Soup
Got to love Canadian Living!

Ingredients:
-1 cup of Jasmine or white rice (I'd argue that this optional, it worked with or without the rice),
-900ml of chicken broth,
-1 stalk of lemongrass, halved crosswise and then again lengthwise,
-6 slices of fresh ginger, about 1/2 inch thick,
-1 lb of boneless, skinless chicken breasts that have been freshly sliced,,
-1 & 1/2 cups of thinly sliced button mushrooms,
-1 cup of frozen peas (another optional, I put about 1/2 cup instead),
-2 tbsp of fish sauce,
-1 tbsp packed brown sugar,
-1 tsp red curry paste,
-1 can (400ml) of coconut milk,
-1/3 cup of chopped fresh cilantro (again, another optional ingredient as far as I'm concerned), and
-2 tbsp lime juice.

Preperation:
Cook rice according to package directions, or according to your rice cooker.

Meanwhile, in large pot, bring broth, lemongrass and ginger to a boil over a medium-high heat. Stir in chicken, mushrooms and peas. Cook over medium-low heat until chicken is no longer pink, about 4 minutes.
Mmmmm... chicken and mushrooms...

In a small bowl, whisk together the fish sauce, brown sugar and red curry paste. Stir into the pot along with the coconut milk. Simmer until hot and fragrant, for about 3 minutes. Discard the lemongrass and ginger.
Sauce bits

cococunt milk's in to almost finish it off

Stir in cilantro and lime juice, and serve over rice.
And another tasty meal by the computer keyboard!

This was an excellent dinner, and as I said, it worked with or without the rice. It did make quite a lot, but it kept pretty well in the fridge for about a week. You do need to mix up the soup before re-serving and heating.

Tuesday, April 23, 2013

Animal print "duct tape" box!

This post could also be titled "Another reason why Dollarama is awesome." Or, "feeding craft addictions since 1992."

Several weeks ago while trolling through my usual list of blogs, and came across this wonderful cardboard box decor tutorial from How Joyful.
 Joy's boxes are custom jobs with some pretty fabulous wrapping paper she found. Love the labels too!

Last week I was wandering through Dollarama ad found some "duct tape" in a Zebra ish pattern. I use the quotes since I'm relatively certain it's not real duct tape from the brand. And I say Zebra ish since it's stripey but not quite like a Zebra. Whatever. I bought a roll of it and decided to spruce up my winter accessories box in the coat closet.
Our very utilitarian front hall coat closet. Yep. The jean machine bag is holding my roommate's two gerbil balls that try to escape frequently.

 Step 1: Find some awesome tape at Dollarama and a box that needs a make over.

 Step 2: Start taping. Depending on your design, you can line it up to continue the pattern. I did the front and both sides and left the back uncovered. I figured the other three sides were more likely to be seen in the long run.

Step 3: Run out of tape as you get to the last row that needs to be done. My previous self saw this coming since the roll was pretty thin, but for some reason, did not buy a second roll.

Step 4: After returning to Dollarama to discover that they have run out of the design you're using and won't be getting more for another two weeks, pick up one of the two neon rolls that are left. Using this as a complimentary colour (like you had planned all along), do the top roll of the box. The neon is a bit see-through, and even with two layers you can still see thick black lettering through it. No matter, since that will be on the sides. Also, use your previous gift wrapping job experience to make the corner fold nicely to look flat and neat.

 SHABAM! Leopard and Neon winter accessories box. 
If you look closely you can see where the tape meets, but I don't think it affects the overall pattern.

Looks nice eh? It's something a little fabulous in the closet.


Sunday, April 14, 2013

Explosions in the mail.

I actually received this package in the mail last week, but it needed a post all its own.

One day, while trolling the web, I heard my mail arrive through the door. I wandered over to throw out the pile of ads and credit card offers, and was surprised by this.

Oooo, a blurrily addressed envelope, perhaps for me?

That's right. An awesome thank you from Aunt Peaches for a Valentines card I sent her.

It's amazing what you can do with hot glue and a lot of confetti. Her original tutorial is posted here on the Elizabeth Banks website, and her redux to create confetti cake toppers is posted here on her website.
And clearly I did not take any pictures of the cards I made for the swap. That would have been far too easy.


Saturday, April 13, 2013

March, early April recap. And a floral crown tutorial

I really need to work on this blog writing thing.

First of all, the floral crown! It's finished! And here are the crappy photos of the build and finished product!

Step 1:
Try to clean your room, and then get board and insist on going for a walk to Dollarama to get some fresh air and some exercise. While there, be inspired and gather your materials.
-6 pack of plastic head bands (multi-coloured no less, black, brown and "blond"),
-Green ribbon, and
-Pack of stick-on paper flowers.
-Have a glue gun and sticks already.

Step 2:
Using your glue gun (badly in my case), wrap your ribbon around the head band. You can either glue and secure as you go along the entire head band, or just mega glue the bottom ends like I do. I found that if you wrap the ribbon tightly, it didn't shift or move once finished.
Pro-tip--> Keep a lighter handy, and burn the edges of cut ribbon to seal them and stop fraying. Burn carefully, they will melt a bit.


Step 3:
Start hot gluing those puppies on! I recommend picking a "front" of the head band, and face the flowers towards that direction. Try to get them fairly close together, or not. Whichever you'd prefer for your crown. There were some instances when the flower became detached from the foam sticky base it was on, so I just added more hot glue. It got a little messy back there, but this will be fixed momentarily.


 Step 4:
Time to cover up that mess in the back. Hot glue ribbon over the foam sticky pads of the flowers. This will cover the mess and further strengthen the flowers on the head band.  I used smaller pieces of ribbon with slits cut in the bottom half to fold over themselves. This, in theory, creates a curve in the ribbon and will allow it to sit a little flatter. I'm sure you can attempt to do this with one piece of ribbon instead of many.


Step 5:
Wear it. Try to fiddle around with strange backgrounds, like an art poster purchase from the Montreal Museum of Fine Arts almost 4 years ago. Also, attempt to actually wear outside the apartment.

There are several floral crown tutorials out there, I know. Lana Del Ray bringing the trend back, along with the summer festival season last year has cemented the floral crown in the young'uns' wardrobe. To add to the repertoire of links to check out, may I recommend,
Mr Kate's DIY fabric floral headpiece tutorial,

Threadbanger's DIY Frida inspired floral crown tutorial (They're back!!! Soooo excited) (one could argue that my crown's construction is very much based on this tutorial),

and of course, the lovely and wonderful, Aunt Peaches's tutorial for a coffee filter fascinator. Yep.


As some of you may remember, I mentioned that I was going to New York City soon. Well, that was last weekend, and it was awesome. It was great to see some of my old classmates, and we got some amazing tours of the New York Public Library's collection of photographs, and the Museum of Modern Art's preservation facility. I also only took two pictures the entire time I was there. Quite pathetic in comparison to the first time I went to New York really, but what can you do? Here they are, by the way.
 Breakfast, at the New York Public Library near Brant Park.
It was pretty awesome. It helped that is was a balmy 15 degrees in NYC, and not the 0 with ice pellets we seem to have in the Tdot at the moment.

I actually have some material for upcoming posts since I'm broke and am saving money by cooking my own meals, some of which in bulk.

Friday, March 15, 2013

A boring week

I've been cleaning my room all week. I've been making room for some furniture I should be getting from my parents' place *soon, and attempting to purge a lot of stuff. I'm half way there.

I also got bored with this idea several times. So I hit Dollarama as an excuse to get outside and get some fresh air. I got further inspired to ignore my room by picking up a few things.

Here's a few hints as to the finished project!

I'll post the finished product once I can get some better photographs of it, not on my desk and maybe in natural light. I wonder how many of my old photography teachers would be appalled by my current habits.

In other news, NEW FREAKIN' YORK. Several lovely ladies from previous years of my Master's program have organized a reunion, and it happens to be around AIPAD. I booked my hostel and flights this past week, and I'm pretty stoked. I've been compiling a list of vintage places and cheap food as another way of ignoring the vacuuming needing doing. Another post, hopefully a picture heavy one.